Category Archives: Technology
Relearning MSX #13: MSX-C commands: CF.COM
Posted by Javi Lavandeira in How-to,MSX,Retro,Technology | February 13, 2015It’s been a while since the last post in this series. At the end of the previous chapter we had a working installation of MSX-C Ver 1.2 with the MSX-C Library package.
Today’s post and the few that follow are a lot more technical. What comes now is a detailed description of the command line programs that compose the MSX-C compiler. The purpose is to allow users who already have some experience programming in C to dive deeper into software development in the MSX platform. If you’re new to compilers and the C language then this probably won’t make much sense yet, and that’s ok. We’ll go back to the basics after explaining these tools.
The information here comes from the books MSX-C Ver.1.2 User’s Manual and the Introduction to MSX-C (MSX-C入門上巻), both by ASCII Corporation.
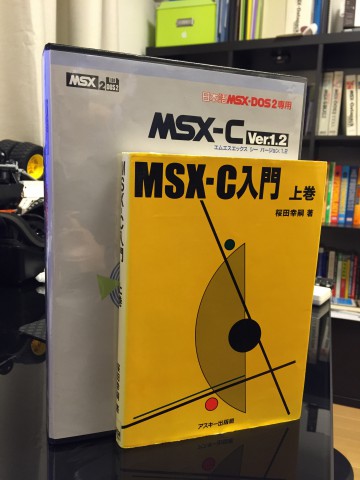
MSX-C Ver.1.2 package and the Introduction to MSX-C book
Relearning MSX #12: Setting up the MSX-C environment (part 6)
Posted by Javi Lavandeira in How-to,MSX,Retro,Technology | January 17, 2015During the last few posts we’ve finished setting up the MSX-C environment and we’ve learnt how to use the AKID text editor. At this point we can already create and compile C programs, but the process is annoying because we have to run all the compiler steps by hand.
In this post we’re going to create a couple of batch files: one to set up some useful parameters in MSX-DOS2, and another to automate compilation of our C programs.
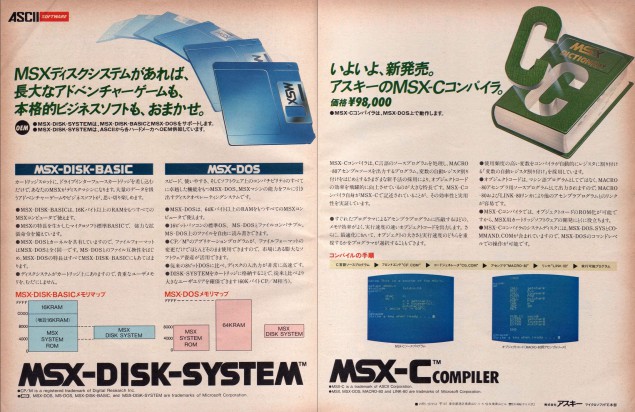
MSX-C ad from 1985. Yes, it was THAT expensive (MSX Magazine, May 1985)
AUTOEXEC.BAT
The first file we’re going to create is called AUTOEXEC.BAT, and it has to be created in the in the top directory of the boot disk (A:). If you used MS-DOS then you already know what it is.
Read more ›RE:birth
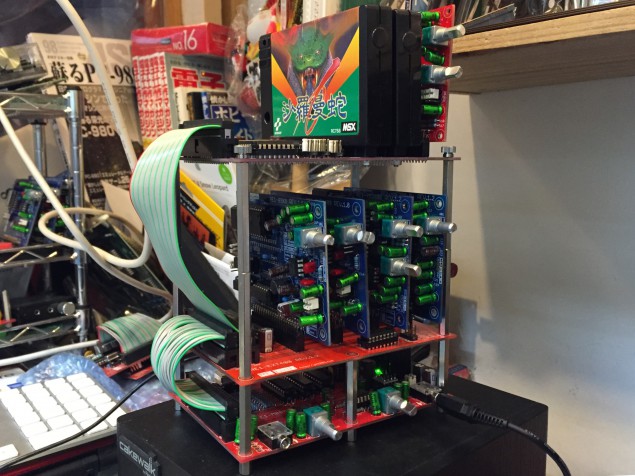
Posted by Javi Lavandeira in Fun,Gadgets,Hardware,Japan,MSX,Retro,Technology | January 15, 2015Today I had to go to Akihabara for work and something caught my attention in an electronics shop not far from the station:
In the background there was playing one of Salamander‘s themes, with perfect timing and perfect instruments. Initially I thought this was a custom-built MSX computers, but it wasn’t.
Keep reading for the details.
Read more ›Relearning MSX #11: The KID (AKID) text editor (part 2)
Posted by Javi Lavandeira in MSX,Retro,Technology | January 13, 2015In the previous post we saw the four menus assigned to the function keys F1 through F4 in the KID/AKID text editors. I left the F5 key for this post because it has a different function: copy and paste blocks of text. I’m going to explain now how to do that, and also some of the keyboard shortcuts available in the editor.
As in the previous post, everything I write about AKID also applies to KID and vice versa, unless I say otherwise. Again, I’ll be using a copy of the CURSESC.C file from the MSX-C Library disk in the examples.
F5: Copying, duplicating and deleting blocks of text
This menu supports three commands:
- C: Copy a block of text to the clipboard (discards the previous clipboard contents)
- A: Adds a block of text to whatever is in the clipboard
- X: Deletes a block of text from the screen and copies it to the clipboard
Unlike the other menus, nothing will appear in the top of the screen when you press F5. Instead, the editor will change to select mode. If there’s text in the line where the cursor is, then the whole line will be highlighed (it will reverse color). At this point you can select more lines of text by moving the cursor, but be aware that you can’t select any text above the current position of the cursor.
After you’ve selected the text you’re interested in you can press C, A or X to apply any of the three commands. ESC cancels the operation and brings you back to edit mode.
By default the keyboard shortcut for pasting the clipboard is . For some reason this key combination doesn’t work properly in my openMSX setup (a Mac with a Japanese keybard), so I’ve changed the shortcut to CTRL-D. I”ll explain later how to change the default shortcuts.
Here’s a video showing this in action:
Read more ›Relearning MSX #10: The KID (AKID) text editor (part 1)
Posted by Javi Lavandeira in MSX,Retro,Technology | January 11, 2015In the last few posts we saw how to install MSX-DOS2, MSX-DOS2 TOOLS and MSX-C v1.2. This is what we’ve done so far:
- Setting up the MSX-C environment, part 1: Emulator setup (openMSX)
- Setting up the MSX-C environment, part 2: Hard disk partitions and MSX-DOS2 install
- Setting up the MSX-C environment, part 3: Install MSX-DOS2 TOOLS
- Setting up the MSX-C environment, part 4: Install MSX-C v1.2
- Setting up the MSX-C environment, part 5: Install MSX-C Library
At this point we can already compile C programs, but the process is annoying and involves lots of typing. The next obvious step is prepare a script to do the work for us, and will require using a text editor. Since I’m assuming no previous experience, I’m going to explain the text editor included in MSX-DOS2 TOOLS, AKID (and its sibling KID) before we prepare our compile scripts.
You can skip this post if you’re already familiar with KID/AKID, or if you prefer to use a different text editor that you’re already familiar with.
What’s exactly a text editor?
Simply put, a text editor is a program to enter plain text in a computer and save it into a text file. Plain text consists just of normal characters: letters, numbers, punctuation marks, newlines, etc.
Do not confuse a text editor with a word processor. A word processor includes extra information in the files it generates. This information may be font names, colors, styles, file version numbers, maybe charts and images, etc.
Read more ›Relearning MSX #8: Setting up the MSX-C environment (part 4)
Posted by Javi Lavandeira in How-to,MSX,Retro,Technology | January 5, 2015(This is another looooong post. Be sure to click the “Read more” button if you’re previewing this post from the blog summary.)
By the end of the previous post we had MSX-DOS2 and MSX-DOS2 TOOLS installed on an MSX with a hard drive. So far everything is installed in drive A:, the first partition in the hard drive.
In this post we’ll proceed to install ASCII’s MSX-C v1.2. We’ll copy some utilities to the A: drive for convenience, but we will use the B: drive for all the compile environment.
Let’s get started.
MSX-C versions
ASCII released two versions of the MSX-C compiler:
- MSX-C v1.1: runs under either MSX-DOS or MSX-DOS2 and generates code that also works on either operating system, but doesn’t have support for MSX-DOS2 functionality
- MSX-C v1.2: runs on MSX-DOS2, and generates MSX-DOS2 applications, and has full MSX-DOS2 support
We will be using MSX-C v1.2.
Read more ›Relearning MSX #7: Setting up the MSX-C environment (part 3)
Posted by Javi Lavandeira in MSX,Retro,Technology | January 2, 2015At the end of the previous chapter we had a working MSX-DOS2 installation. Those of you using openMSX now have a setup like this:
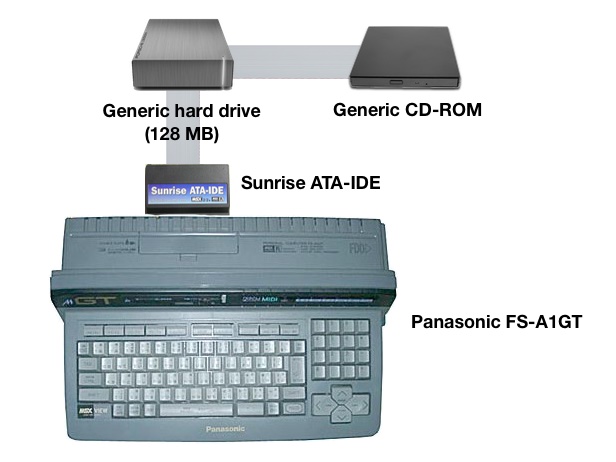
Current MSX setup under openMSX
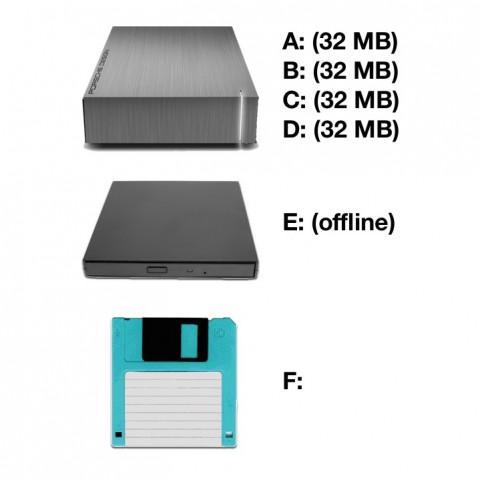
Disk drive names under openMSX
From this point on, the explanations in these series will work the same on an emulator and on a real MSX computer, unless I explicitly point out the differences. One of the things that you’ll have to pay attention to if you’re using your MSX are the drive letters. They may be different in your machine.
Let’s dive in.
Read more ›Relearning MSX #5: Setting up the MSX-C environment (part 1)
Posted by Javi Lavandeira in Gadgets,MSX,Retro,Technology | December 29, 2014This article has moved to MSX Center.
Relearning MSX #3 – User environments
Posted by Javi Lavandeira in Hardware,How-to,MSX,Retro,Technology | December 18, 2014This article has moved to MSX Center.
Relearning MSX #1 – Introduction
Posted by Javi Lavandeira in Fun,Hardware,How-to,MSX,Retro,Technology | December 11, 2014This article has moved to MSX Center.

